Regulative
Development in Axolotl Embryos; Splitting the Heart
Field
|
|
|
Materials
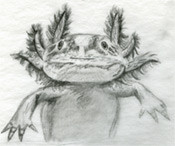
Axolotl
embryos (stage 14-16)
1%
agarose-coated operating dishes
100% HEPES-buffered Modified Steinberg's Solution
(HBSt)
with antibiotics (gentamycin at 70 mg/ml)
50% HBSt
20% HBSt
Microsurgery
tools
(tungsten knives and hair loops)
Procedure
1) Remove the first two jelly coats from several stage 14-16 embryos
a. Transfer embryos into dish of 20% HBSt using plastic pipet (the tip should be cut off so that you can suck up the embryos as if they were the bubbles in bubble tea).b. With finest forceps, grab and pierce the more interior of the two visible jelly coats. This takes practice and patience, as the jelly is very slippery.
c. Once pierced, firmly pull the jelly coat apart, taking care not to squash the embryo in the process. The embryo should pop out nicely once the jelly coats are opened up enough.
2) Remove the vitelline membrane
a. Prepare 1% agarose-coated operating dishi. Heat glass pipet tip using Bunsen burner until melted into a little ball at the tipii. Press hot tip to several places in the dish to form little indentations in the agarose. This will help hold the embryos in place while operating.
iii. Fill dish with 100% HBSt with gentamycin
b. Place embryos in operating dish and let sit for about 5 minutes. This will allow the vitelline membrane to puff up with water somewhat, making it easier to remove.
c. With plenty of light from the stereoscope, look for vitelline membrane around embryo. Gently try to grab it with fine forceps and pull off. Again, this takes practice and patience. * Damaged embryos should be transferred to a separate dish for use as tissue donors etc.*
3) Obtain gill tissue from stage 16 donor
a. Place donor embryo in one of the indentations in the dish with its flank side facing up, ventral side toward you, and dorsal away.b. In the lower anterior corner there should be a slightly lighter colored region (the presumtive gill tissue); this is what you want to cut out (Figure1); use a tungsten knife to cut and a hair loop to help hold the embryo in place. This cutting takes some getting used to; don't be surprised if at first you end up squishing the embryo into many little yolky cells.
4) Prepare host (~ stage 15) for tissue transplant
a. Place host embryo in one of the indentations with ventral side up.b. Using the tungsten knife to cut and hair loop to help hold the embryo in place. Make an incision that is about a third the length of the embryo, but towards the anterior. You just want to break the exterior and scrape a little way into the cells so there will be enough room for the graft. This also takes a bit of practice.
5) Put tissue transplant into host
a. Pick up tissue transplant with hair loop and transfer into incision in host.b. Use tungsten knife and hair loop to gently but firmly push tissue into incision
6) Allow to heal overnight in their operating dishes,
then gradually replace solution to reduce concentration to
20% HBSt.
7) After embryos heal, transfer to fresh agarose-coated
dish.
8) After 3 or 4 days, check for heart pulsations, being sure
to note if two heats have formed, and if they have, whether
or not they beat in synch.
9) Collect photos and video of successful hosts.

Figure 1. Outline of donor embryo (stage 16), showing location of the tissue that is to be used for the graft.

Figure 2. Diagrams of host embryo (stage 14), showing dorsal (D) and ventral (V) views, as well as location of heart primordia, and area where the incision is to be made.