Making Your Own Web Page
E5 2007
This document describes how to create a simple web page of your own.
It is organized as follows:
Before Starting Your Web Page
Create Your Web Page
Going further
Before Starting Your Web Page
Log in to the engin server and change your password.
An account has been created for you on our department's server (which runs
the Linux operating system).
For security reasons, you need to log in to the account ONE TIME ONLY to change
your password. You probably won't need to log in again this
semester. Start by logging into one of the Windows machines in room 213
using the user name and password supplied by ITS. Run the program called "SSH Secure Shell Client" that you'll find via Start -> Programs -> Internet & Media Applications -> SSH Secure Shell -> SSH Secure Shell Client.
Hit the spacebar or the "Enter" key to get a prompt. When prompted for a server, type "engin", enter your user
name and hit "Connect".
At the prompt, enter your password (which I will give you). When the Host Identification Dialog Box pops up, just click on "Yes".
Log in to the Linux server with your user name and password. At the prompt
(which will look something like "[ceverba1@celeborn ceverba1]$") enter the command: "passwd" and hit return. Enter a
new password for your account (it prompts you first for the one I gave you). If you have any problems, please contact me.
Logoff the SSH server by typing "exit" at the prompt.
Access the location on the server where your web page
will be stored.
If you have not already done so, start by logging into one of the PCs in Hicks 213. You will now add
your web page to your "network places" on the PC. The
directions below were used for my own account on the engineering server.
- If you are not already logged on, log on to one of the PC's in 213 with the user name and password you
received from ITS.
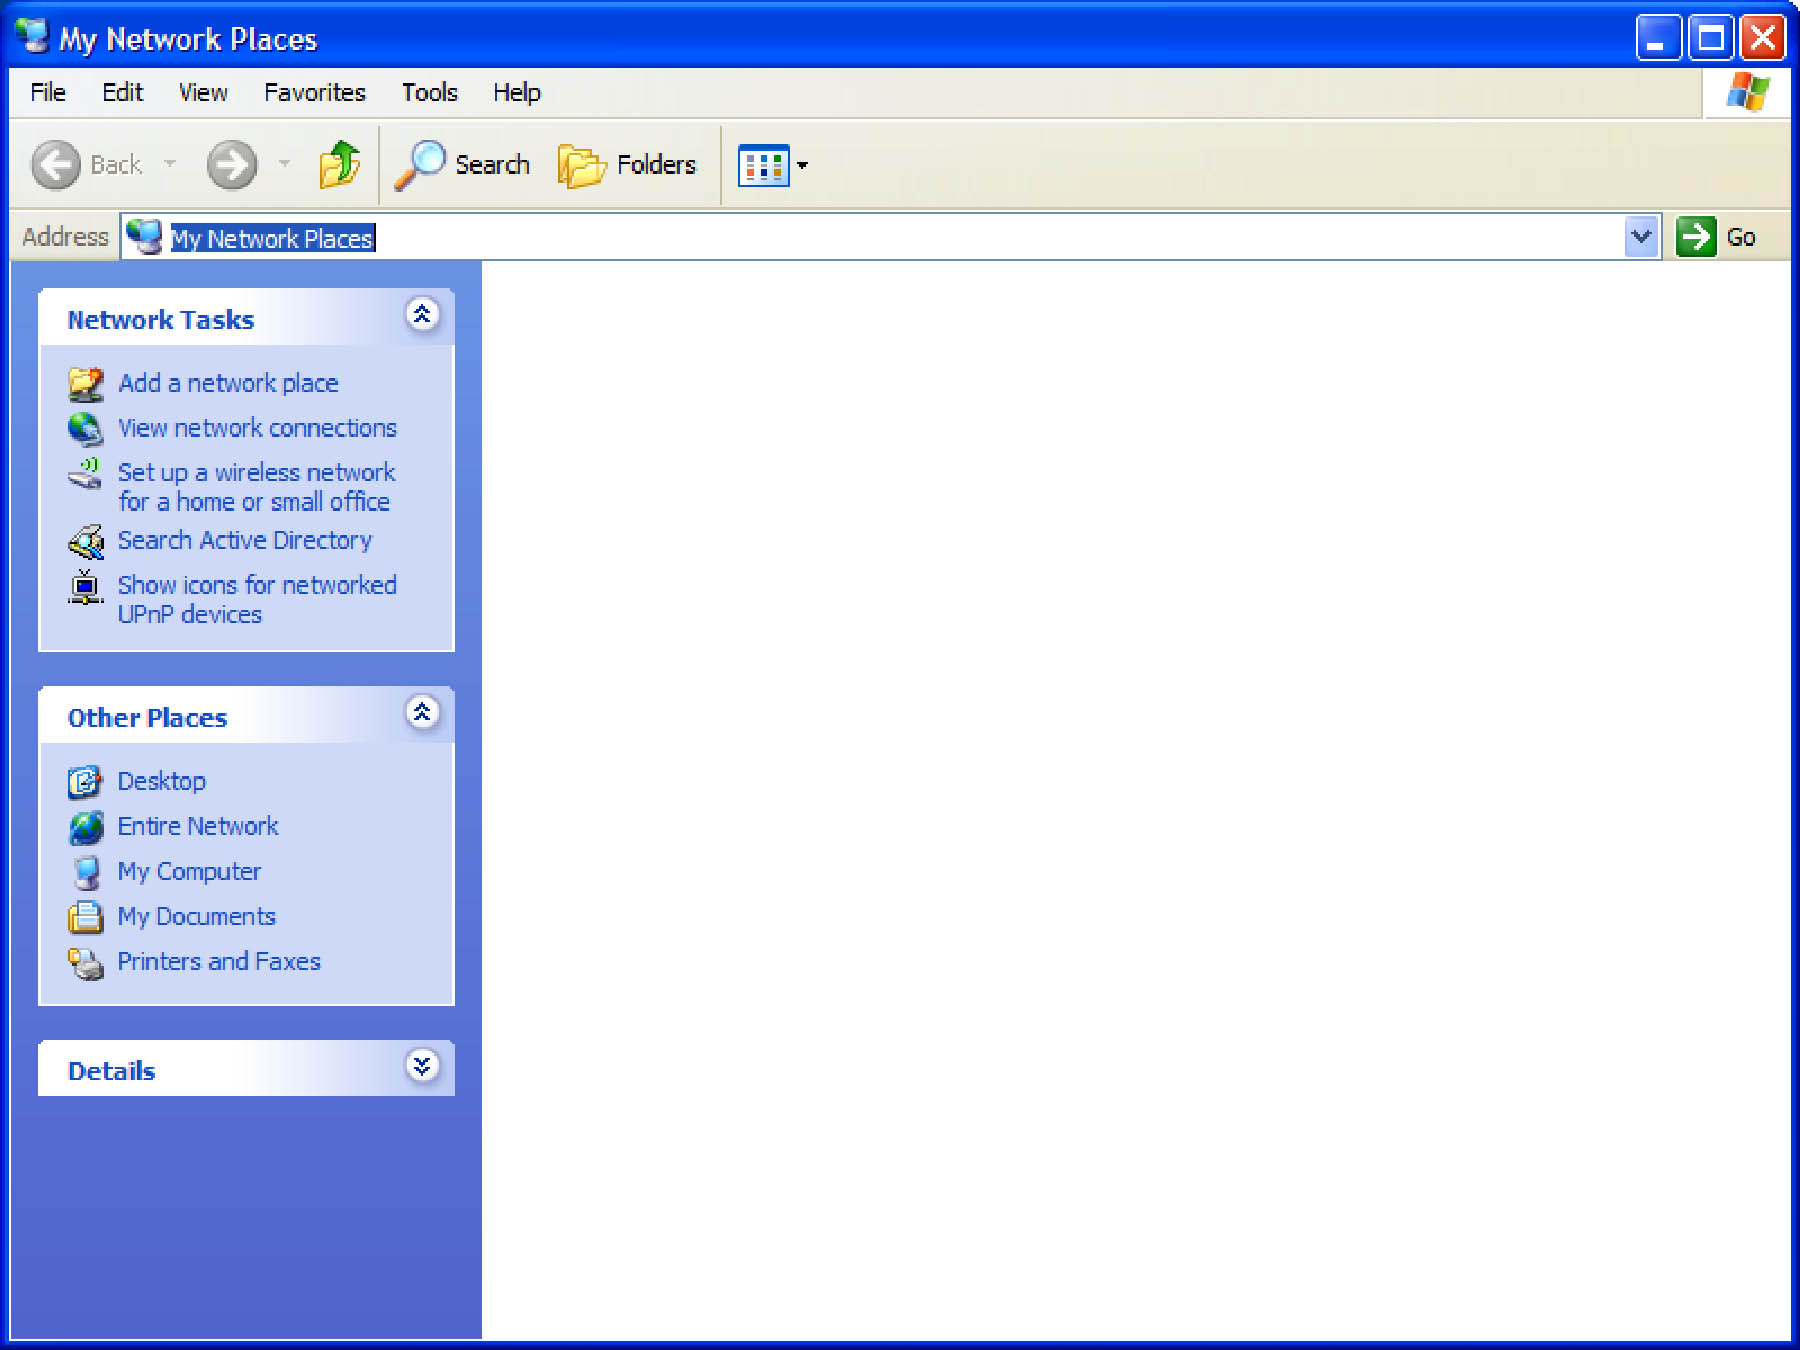
- Double click on the My Network Places icon on the desktop.
- Drag the cursor across the words "My Network Places" at the top:
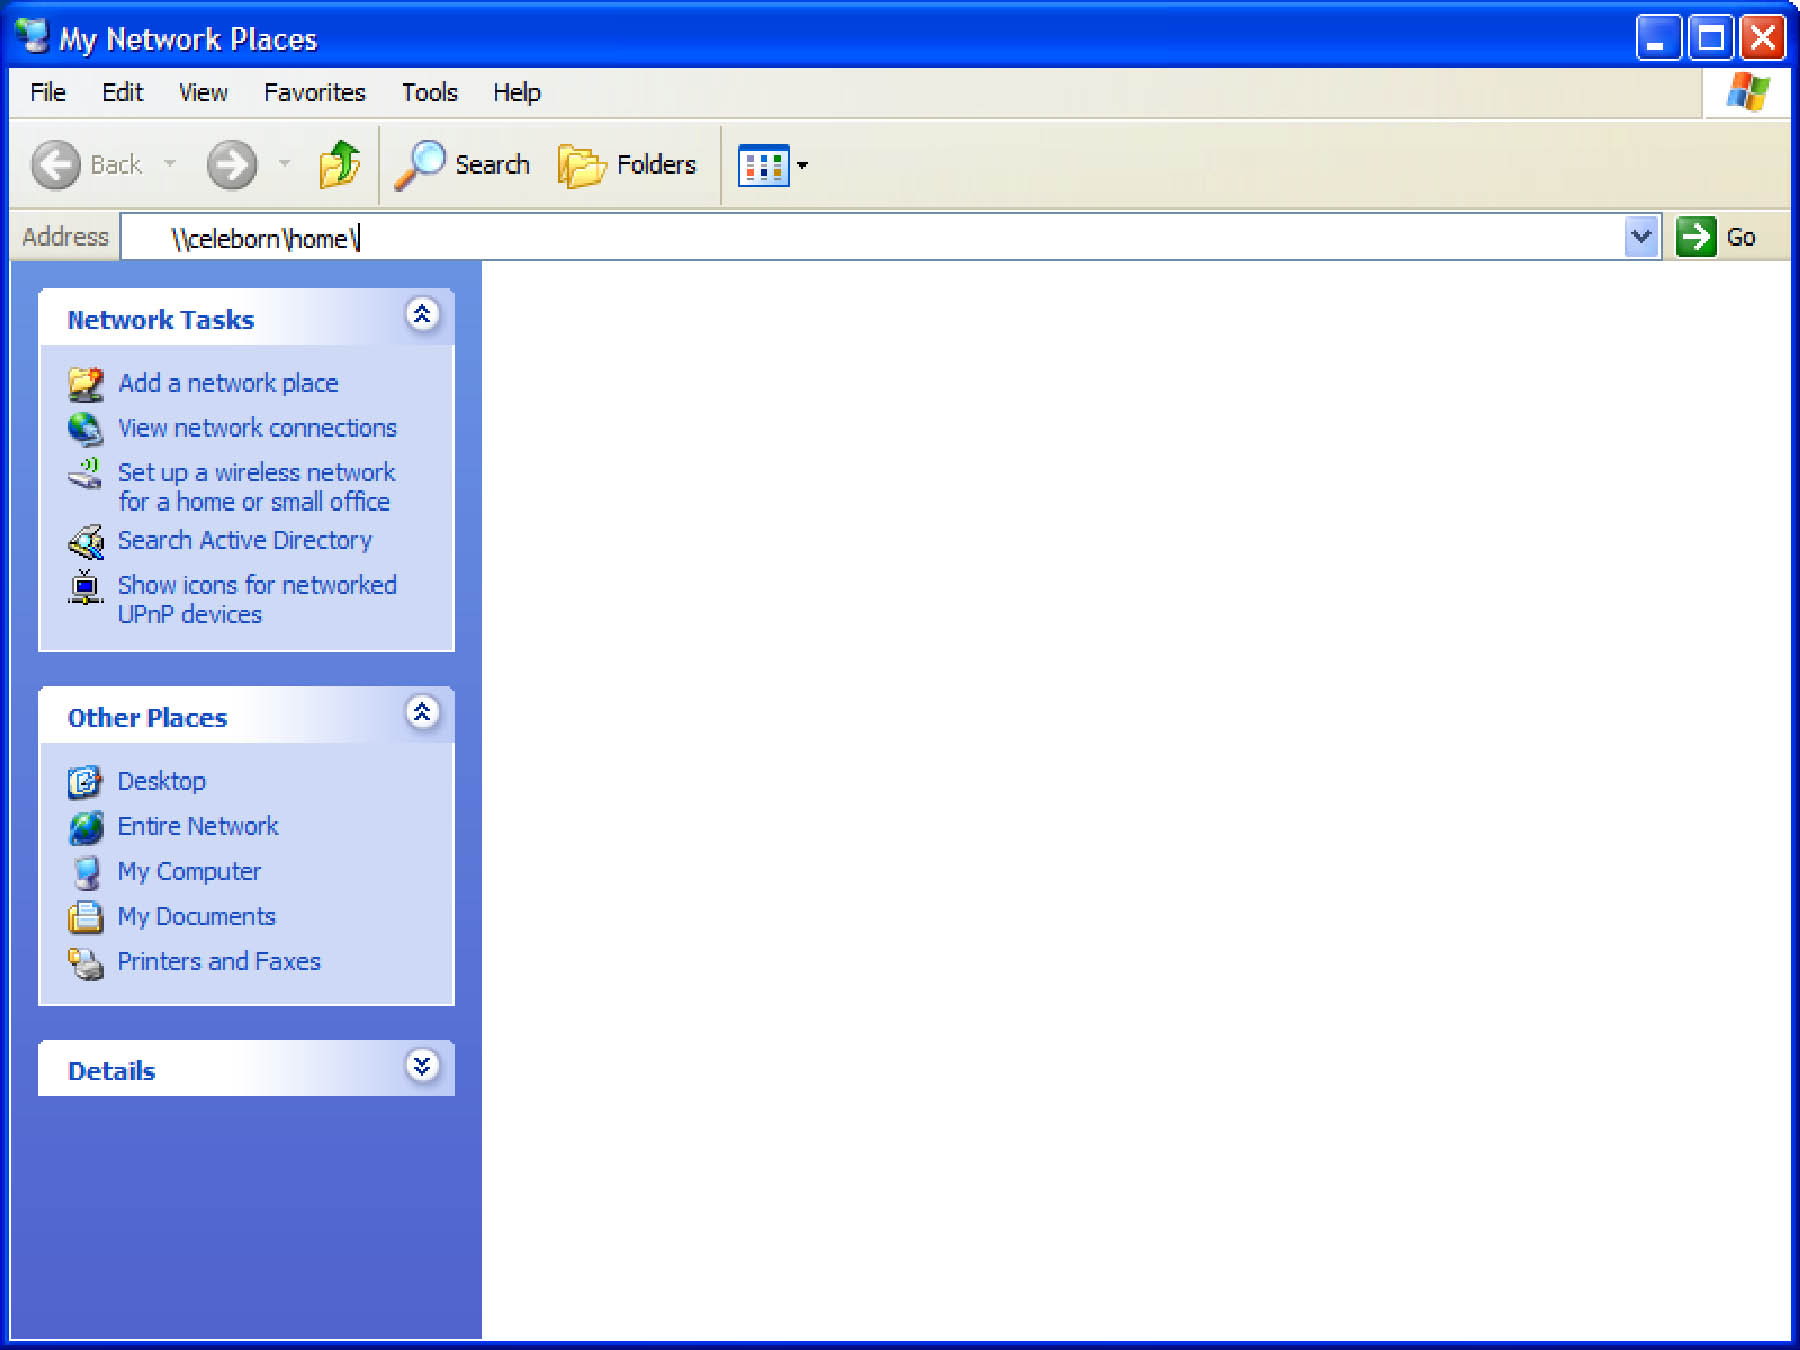
- Type \\celeborn\home\ on the keyboard. It should replace "My Network Places":
- Press the Return key and you should see the home level of the celeborn server:
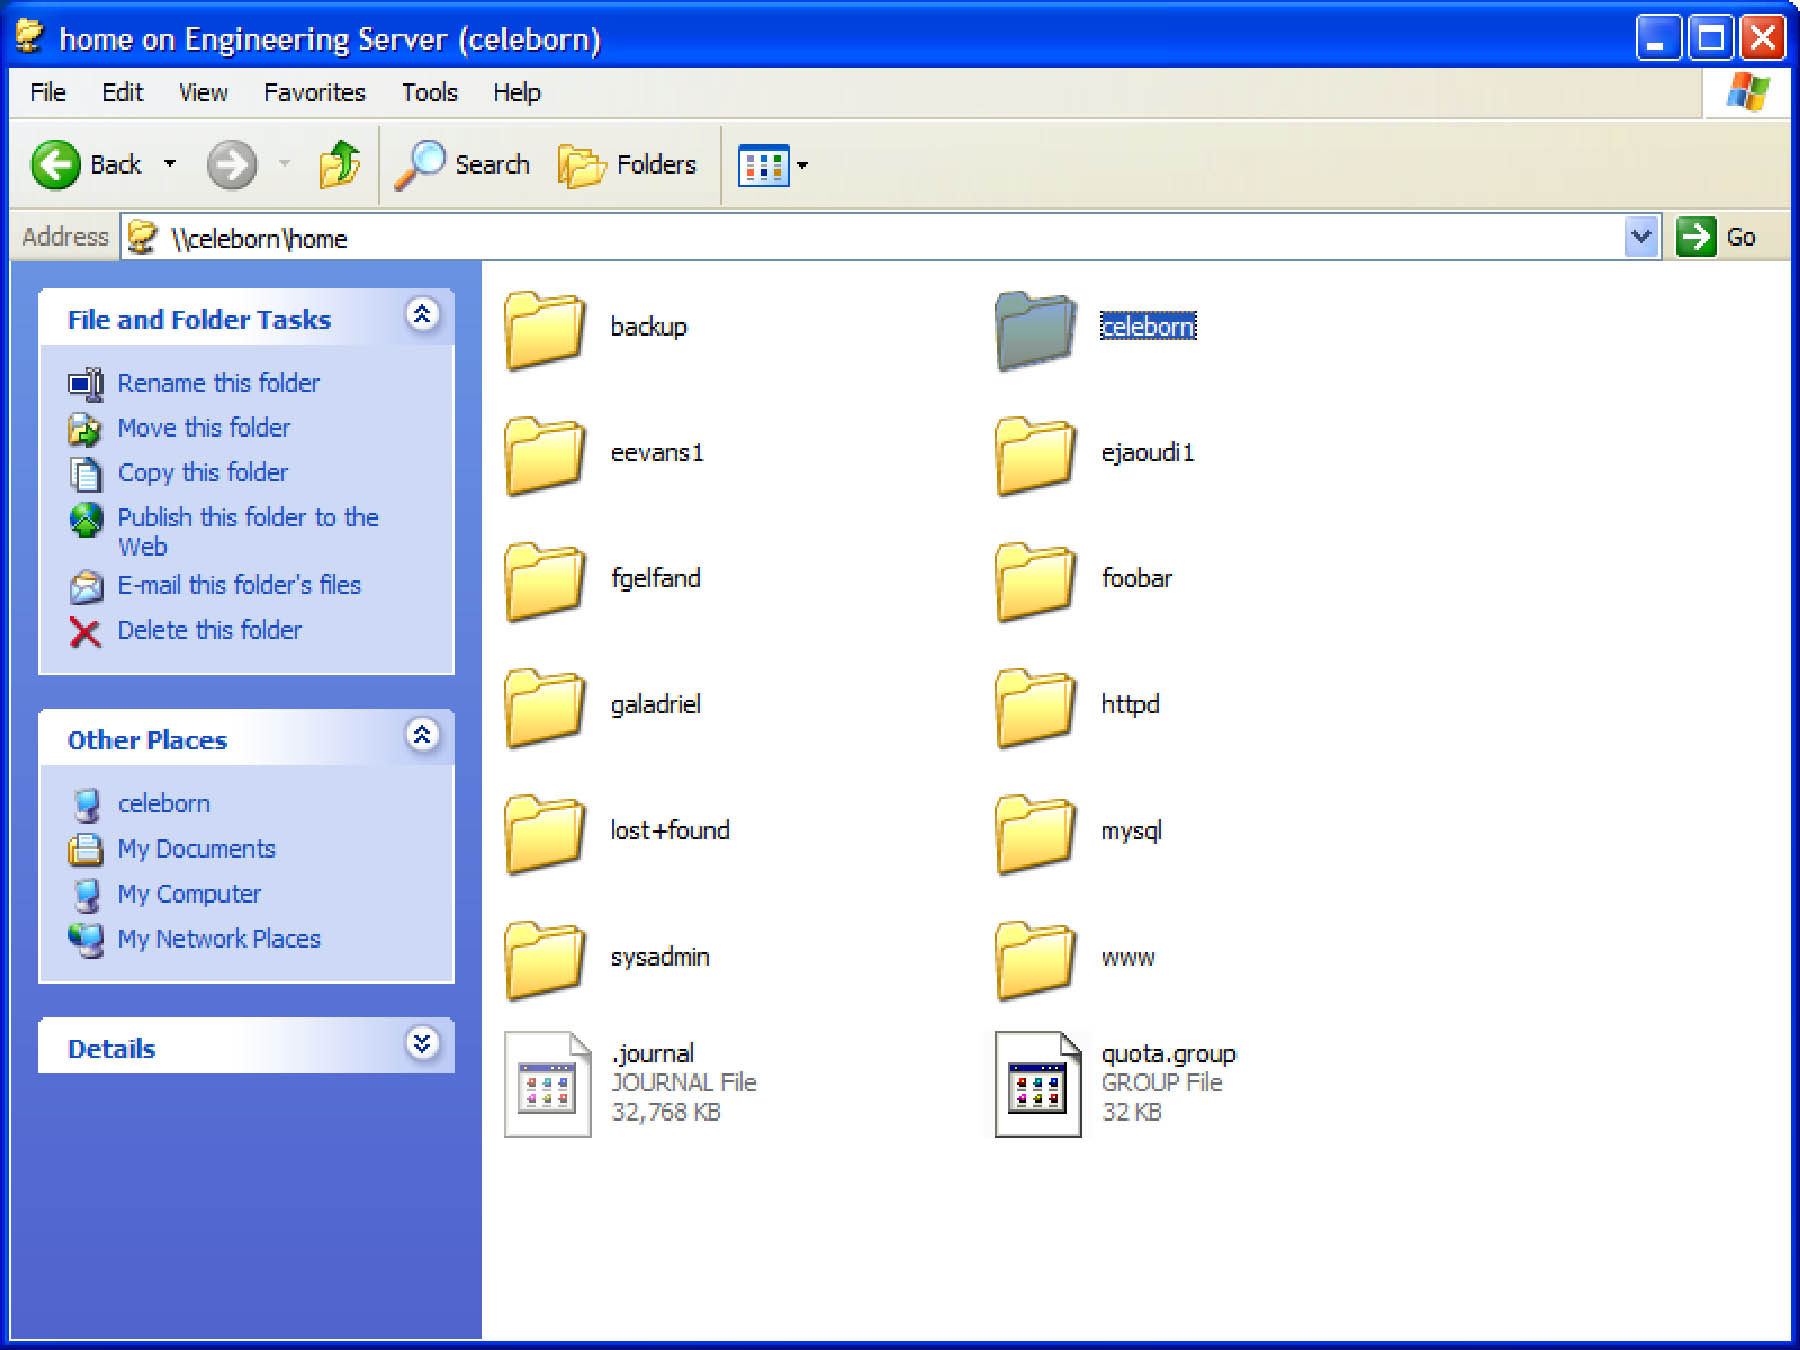
- Double-click on "celeborn," Class11," and the folder name of your ITS username.

- Move this window to the right to make room, then double-click the My Network Places icon on the desktop once again. When it opens, drag the public_ html folder from your engin.swarthmore.edu directory (the one in the window you just moved) onto the My Network Places panel.
- A shortcut to your web folder (public_html) is now in your My Network Places folder. Any file you drag onto this shortcut will instantly be live on the web server.
You have now created a named network location at which you will store your
web page.
Create Your Web Page
Start "Macromedia Dreamweaver MX 2004" under Start -> Programs. This may take several
minutes the first time you run it. Dreamweaver is the program that you
will probably be using to create your web pages; it is freely available from
ITS so you should be able to run it from your own computer (if you have one). If you have another
program that you would rather use, please feel free to do so. Microsoft
Word can generate web documents (HTML - HyperText Markup Language), but the HTML really stinks, so I advise against this. If you are very web-sophisticated, you can
actually write HTML code in a text editor and upload it directly (though web authoring programs like Dreamweaver are MUCH easier to use).
Start a web site.
Dreamweaver will organize all of your files into what it calls a
"site". When first started, Dreamweaver prompts you for a new "site" and asks you to name it. If it doesn't, or you wish to start another site, use the menu Site -> Manage Sites... and then select "New".
- Choose a name for your site. I picked "CarrEverbachE5WebPage"
for mine. Hit the "Next >" button.
- Choose "No, I do not wish to use a server technology" and
hit the "Next >" button.
- Choose "Edit directly on server using local local
network." Hit the button that looks like a folder (
 ).
Select "My Network Places".
).
Select "My Network Places". 
- Then choose the network place you defined previously.
- When the Site Definition dialog box returns (this may take a while
because of the network operations), hit the "Next >"
button, then "Done" and then "Done" again.
Place files in your web site.
Now lets add a file to your web site, and see it in action.
- Type some text into the bottom window of the file to start your web
page. Then go to File->Save. Save the file to the network
place you defined previously with the name "index.html".
This will store it on the engin Linux server in your "public_html"
directory.

- The web document (labeled "Untitled Document") is split into two windows. The bottom window is where you will add text, much as you would for a word processor. The text appears much as it would on a web browser. The top window shows the HTML code that actually comprises your web page -- you can feel free to ignore this if you want to. If you want to turn it off you can click on the "Design" tab under "Untitled-1" (or go to the menu at the top of the application window and select View->Design.)
- Choose "Split" from the menu bar under "Untitled-1" (or "Split" under the View Menu at top). Eventually, you should get a screen that looks something like the following:

- You should now be able to see your web page using a web browser. The web address for my page is "www.engin.swarthmore.edu/~ceverba1/index.html".
Replace "ceverba1" by your username.
- If your page works, then continue; if not, review the directions and try to
fix your page. If you have trouble, please see me or one of the student helpers.
- You will often want to link to external pages; we will add a link to the departments web
page (you can add any page you would like to add). Type in the text first,
highlight it with the cursor, then go to Modify->Make
Link.
- Under "URL" put "http://www.engin.swarthmore.edu"
and hit the "OK" button. You can also just type this into the link field in the Properties tab at the bottom of the screen.

- Now add an email link so people can email you. Add text that
says something like "Send me email." Highlight the part
of the text that you want to use as a hyperlink and then go to the menu
and choose "Insert->Email link",
and enter your email address (you can just type "mailto:ceverba1@swarthmore.edu" into the link field in the Properties tab at the bottom of the screen; use your own email address and not mine!).
- Now add an image. You can use the one below if you right-click on the image
and select "Save Picture As" and save it to the Network Place you
defined previously. IMPORTANT: You must have a copy of the image you want in your website (the public_html folder nickname on your My Network Places folder) before you add it to your document, otherwise it will not be available when users browse your site.

- In Dreamweaver, drag the image file "HicksBitMapWeb.gif" to
your web page where you would like it to be placed. If you
used another image, you can cut and paste like you would with any word
processing program. Alternatively, you can choose Insert -> Image from the menus at the top and then find the image on your website and click OK. If you've put all your images in a sub-folder you created in your public_html folder, this is the best way to ensure that the webpage correctly specifies the location of the image.
- Now go to "File->New" and choose "Basic
Page" and hit the create button. Add some text to the new
file, Now save your file as "file2.html".
- Now a link back to your original file, "index.html".
- Now edit your "index.html" to include a link to
"file2.html".
- Save both files, and make sure that all links are working.
This completes the first lab. When you are sure everything on your web
page is working, send me a link to your page. Refer to the lab
description for complete details about requirements for turning in the lab.
Try creating more files and links between them. You can also skim
through the Dreamweaver tutorial (go to Help->Tutorial).
If you want to use a digital
camera, one is available.
